REVIEW · LOS ANGELES
Photo Tour of Los Angeles for Social Media
Book on Viator →Operated by Laphotour · Bookable on Viator
LA icons. One camera-ready day.
This is a private photo tour of Los Angeles built around getting you to the right places for social-media photos, with pickup offered and an English-speaking guide. You start at 8:00 am, then work through a tight, famous-to-coastal route with stops that include the Hollywood Sign, Hollywood Boulevard, Rodeo Drive, Griffith Observatory, LACMA’s Urban Lights, and Santa Monica Pier.
I love the photo guidance built into the walk-and-drive rhythm. The guide doesn’t just point; they help you land in the best spots so you can get shots that look like you planned them, even if you didn’t. I also love the full-day route because you’re not stuck choosing between “Hollywood” and “beach” in a single day.
One consideration: the schedule packs a lot into about 8 hours, with each main stop getting roughly 1 to 2 hours. If you’re the type who wants to linger for ages in one spot, you’ll need to go with the flow and prioritize your must-shoot moments.
- Private group only, so the day stays focused on your people and your photos.
- Six major photo stops spanning Hollywood, Beverly Hills style, Griffith views, LACMA’s Urban Lights, and Santa Monica’s pier area.
- Pickup offered plus a mobile ticket, which makes the meet-up part easier than it should be.
- Admission ticket free for the scheduled photo stops, so you’re not budgeting entry fees into the day.
- English-speaking guide focused on helping you produce social-media-ready shots at each location.
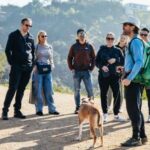
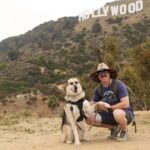
- Service animals allowed and the tour is set up so most people can join in.
In This Review
- Los Angeles in One Photo Day: Why This Route Feels Smart
- Price and Value: Is $164 Worth It for an 8-Hour LA Day?
- The Morning Plan: 8:00 am Start, Pickup, Mobile Ticket
- Your Photo Route: Hollywood Sign, Rodeo Drive, Griffith, Urban Lights, Santa Monica Pier
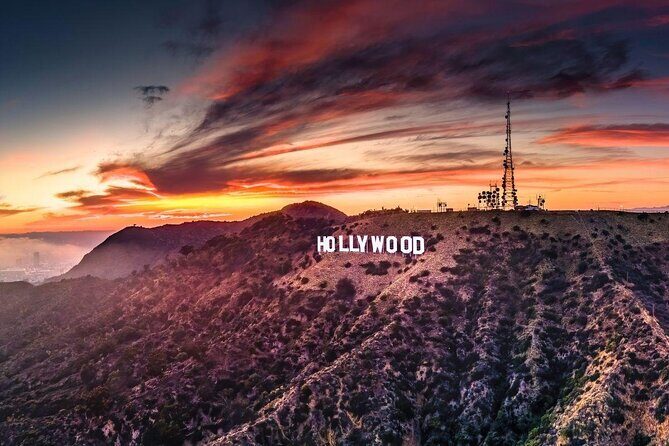
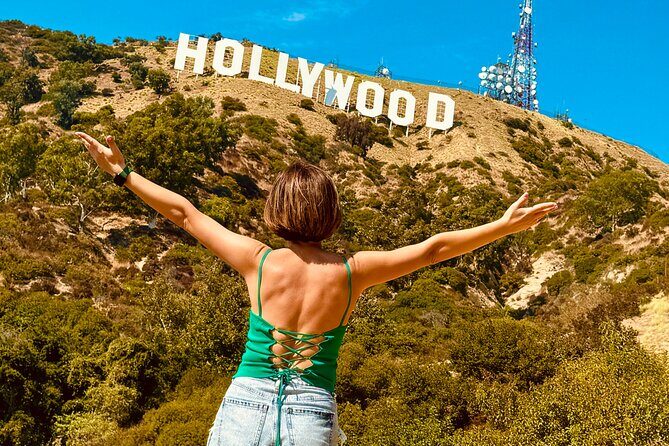
- Hollywood Sign: Your Classic Starting Shot
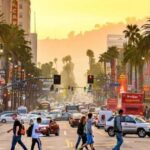
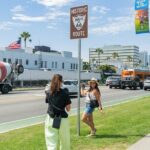
- Hollywood Boulevard: Turning Icons Into Social-Media Frames
- Rodeo Drive: Luxury Backgrounds for Portraits and Fashion Shots
- Griffith Observatory: Big Views and a Strong Backdrop
- Urban Lights at LACMA: The Photo Spot That Works Every Time
- Santa Monica Pier: Ocean Light and a Finale That Feels Like Vacation
- What You Actually Get From the Guide: Photo Direction That Saves Time
- Timing, Comfort, and Small Prep That Makes the Day Easier
- Who This Los Angeles Photo Tour Fits Best (and Who Might Skip It)
- FAQ
- FAQ
- How long is the Los Angeles photo tour?
- What time does the tour start?
- Is pickup included?
- Is this a private tour?
- What language is the tour offered in?
- Are admission tickets included?
- Will I receive a mobile ticket?
- Can I cancel for a full refund?
- Who is allowed to bring a service animal?
- Should You Book This Photo Tour of Los Angeles?
Los Angeles in One Photo Day: Why This Route Feels Smart
Los Angeles is huge, and first-time plans often get messy fast. This tour fixes that problem by taking you from the biggest recognizers (Hollywood Sign, Hollywood Boulevard) to the “wow, where’s that light coming from” spots (Griffith Observatory, Urban Lights at LACMA, Santa Monica Pier).
What makes it work is that it’s designed around photo stops, not museum stops or long lectures. You’re moving through the city with a goal: show up, frame up, shoot, and move on to the next background that actually photographs well.
Also, it’s private. That matters in LA, where you don’t want to spend your day waiting for a big group to regroup. You get a smaller, more controllable pace that fits real photo-taking time instead of a rushed “next, next, next” shuffle.
Price and Value: Is $164 Worth It for an 8-Hour LA Day?
At $164 per person for about 8 hours, you’re paying for more than just transport. You’re paying for guided photo positioning at multiple famous locations, plus time protection—someone handles the “where to stand” problem so you can focus on the shot.
Here’s where the value clicks into place:
- You’re getting multiple iconic backdrops in one day instead of spending your time hunting for parking and best viewpoints.
- Admission is listed as free for the scheduled stops, which helps keep the cost from ballooning mid-day.
- Pickup is offered, which is a real money-saver in time and energy if you’re staying off the main corridor.
- Private tour means fewer trade-offs. You’re not competing with other groups for workable photo angles.
Is it “worth it” for everyone? Not automatically. If you already have a car, know exactly where you want to shoot, and you’re happy winging it with your phone tripod, you can DIY a version of this. But if you’d rather pay for the guidance and just execute the plan, this kind of day is usually a good deal.
You can also read our reviews of more photography tours in Los Angeles


The Morning Plan: 8:00 am Start, Pickup, Mobile Ticket
The tour starts at 8:00 am, which is a practical choice. Early starts help you get to popular photo areas before they swell, and they give you enough daylight to work through Hollywood-style locations and still reach the coastal spots.
You’ll also have pickup offered, so you’re not forced into finding a meet point while everyone else is already doing the city-parkour thing. There’s a mobile ticket, which usually means fewer printed documents and less “where did I put that email” stress.
A couple of small notes that can affect how your day feels:
- It’s private, so your group can set a comfortable pace for photo breaks.
- It’s English-speaking, which matters if you want clear, quick feedback on positioning or camera/phone settings.
- Service animals are allowed, which is helpful for travelers who need an accommodation made in advance.
Your Photo Route: Hollywood Sign, Rodeo Drive, Griffith, Urban Lights, Santa Monica Pier
This itinerary is built like a best-of LA photo reel. Each stop is scheduled for about 1 to 2 hours, which is enough time to do several takes, switch angles, and still keep the day moving.
Below is what each stop is good for, and what to watch out for.
Hollywood Sign: Your Classic Starting Shot
You begin with the Hollywood Sign area, the kind of photo that instantly makes your feed feel like LA. The guide’s job here is to show you the best iconic spots and help you capture the sign with clean background lines instead of messy clutter.
What I like about starting here is that it sets the tone. You’re not scrambling later for the one shot everyone came for—you get it early, then you build outward with the rest of the day.
Consideration: It’s a photo-focused stop, so you’ll likely move through the area in an organized way rather than “wander forever.” If you want unlimited time at the sign itself, you’ll have to decide your top angles quickly.
Hollywood Boulevard: Turning Icons Into Social-Media Frames
Next is Hollywood Boulevard. This is where you capture the classic “I’m really in Hollywood” feeling—street-level energy, iconic storefronts, and all the recognizable visual cues that your friends will understand instantly.
The guide helps you jump past the dead ends: the spots that look fine but don’t give a strong frame. You’ll get photo opportunities along the way that feel made for captions and quick reposts.
Consideration: Hollywood Boulevard can be busy in general. Even with a guide handling the best angles, you may want to plan for a little waiting for clear sightlines.


Rodeo Drive: Luxury Backgrounds for Portraits and Fashion Shots
Rodeo Drive gets the longest block after the first major landmark stops, with about 2 hours. That extra time matters because this is a street where you’ll want multiple takes: wide shots for the street vibe, plus tighter shots for portraits.
If your style is more fashion-forward, Rodeo Drive is a strong choice. It’s also a good place to shoot in different modes—couple photos, solo portraits, and group photos without feeling like you’re repeating the exact same image.
Consideration: If you don’t care about the “glam street” vibe, you may find it less memorable than other stops. But if you do, this is one of the best opportunities all day.
Griffith Observatory: Big Views and a Strong Backdrop
Then you move to Griffith Observatory, a stop that typically delivers photos with drama and depth. You’re not just shooting a building; you’re shooting LA’s scale. With the guide’s help, you can position yourself for the view lines that look best on camera.
I like this stop because it breaks up the street-level stuff with a perspective shift. Your feed gets variety, and your photos stop looking like they all came from the same corner.
Consideration: This is a 1-hour stop. It’s long enough to get several good frames, but short enough that you should decide what matters most to you: wide views, portraits, or specific angles.
Urban Lights at LACMA: The Photo Spot That Works Every Time
At Urban Lights at LACMA, you get one of LA’s most instantly recognizable photo setups. This is the kind of location where even a basic phone shot can look like you worked with a professional photographer—because the background does so much for you.
The guide’s value here is helping you stand in the right place for symmetry and avoiding the messy background that ruins “clean” looking shots. It’s a classic location for pairs, families, and anyone who wants an easy win with minimal fuss.
Consideration: Because it’s famous, you might see a crowd at times. The guide helps you make the wait shorter by moving you into workable positions faster.
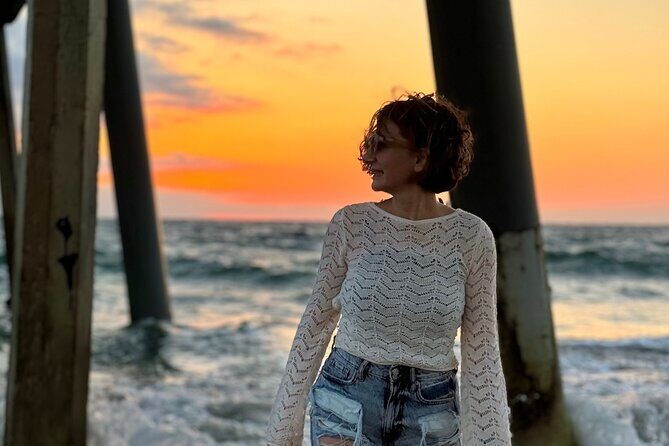
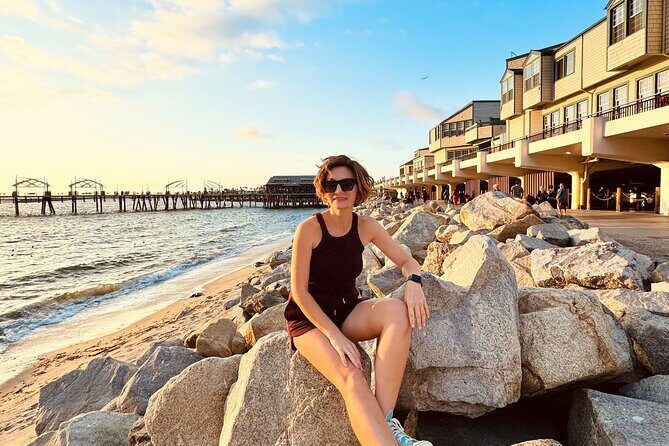
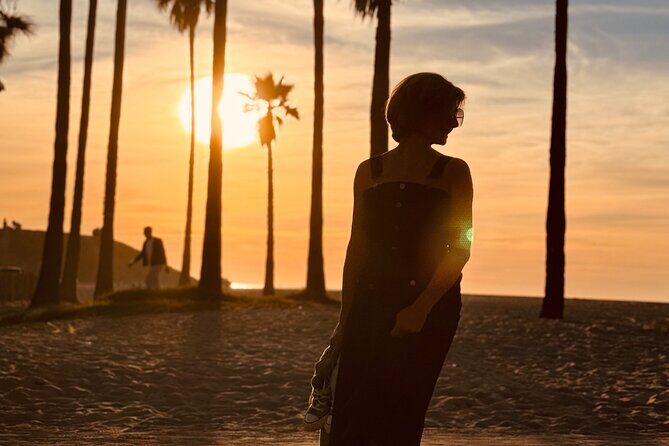
Santa Monica Pier: Ocean Light and a Finale That Feels Like Vacation
You finish with Santa Monica Pier, with about 2 hours here. This is where your photos start to feel like a vacation postcard instead of just “famous LA stops.”
Expect plenty of photo opportunities with ocean backdrops and pier views, plus options for both wide and close portraits. It’s a strong ending because it gives you variety and makes the day feel complete—Hollywood to beach.
Consideration: Like many coastal areas, it can be breezy and changeable. Dress with comfort in mind so you’re not distracted while you’re trying to shoot.
What You Actually Get From the Guide: Photo Direction That Saves Time
The best part of this kind of tour isn’t the list of places. It’s what the guide does at each stop so you get usable photos without wasting half your time figuring things out.
From the way these guides operate, they tend to:
- Point you to the best iconic spots for recognizable LA angles
- Help you create multiple shots instead of one awkward try
- Offer practical feedback, and in some cases help with camera settings if you want to level up
- Add unique angles and lesser-seen spots so your photos don’t all look identical to everyone else
This is also the kind of tour that tends to work well for different skill levels. If you’re new to photography, direction keeps you from overthinking. If you know your settings already, it can still help because the guide is steering you toward better backgrounds and compositions.
If you want the most out of the day, do this: tell your guide what kind of photos you want right at the start—couple shots, portraits, “icon with me in frame,” or clean social-media compositions. Then you’ll get more targeted help instead of generic posing.
Timing, Comfort, and Small Prep That Makes the Day Easier
An 8-hour photo tour sounds simple until you’re standing in the sun and doing multiple takes. Here’s how to make it feel smoother:
Wear shoes you can walk in. You’ll be on your feet across several photo areas, and you’ll move more than you expect because the tour is photo-first. Bring water and a phone charger if you’re shooting heavily. If your phone battery dies at Urban Lights, you’ll be doing a lot of standing and very little taking.
Also, think about your photo plan before you arrive:
- Pick one or two “must get” shots per stop
- Decide if you want wide shots, portraits, or both
- If you’re using a camera, arrive with settings you already know so you can focus on composition
The tour is built with enough time at each location to do more than one attempt, but it’s not built for endless lingering.
Who This Los Angeles Photo Tour Fits Best (and Who Might Skip It)
This experience is a great match if you want:
- A one-day LA plan that covers major icons without planning stress
- A guide to handle where to stand for better photos
- A mix of Hollywood glitz and beachy endings
- A private day that feels like it’s centered on your group
It’s also a strong option for couples and small groups who want photos that look planned, even if you’re visiting for the first time.
Who might not love it? If you’re the type who wants deep neighborhood wandering, long museum time, or a highly flexible schedule, a structured photo route may feel limiting. In that case, you’d probably be happier renting a car and designing your own day.
FAQ

FAQ
How long is the Los Angeles photo tour?
It runs for about 8 hours.
What time does the tour start?
The start time is 8:00 am.
Is pickup included?
Pickup is offered.
Is this a private tour?
Yes. It’s a private tour/activity, and only your group participates.
What language is the tour offered in?
The tour is offered in English.
Are admission tickets included?
The stops listed show admission ticket free.
Will I receive a mobile ticket?
Yes, a mobile ticket is offered.
Can I cancel for a full refund?
Yes. Free cancellation is available, and you can cancel up to 24 hours in advance for a full refund.
Who is allowed to bring a service animal?
Service animals are allowed.
Should You Book This Photo Tour of Los Angeles?
I’d book it if you want a structured, photo-first LA day that hits the big recognizers and still leaves room for multiple shots at each stop. The private format and guided direction make the biggest difference if you don’t want to waste time figuring out where your best angles are.
Skip it if you already have your own photo plan nailed down, you’re comfortable driving around LA, and you don’t need help with timing and composition. In that case, you might get similar results with a DIY route.
For most people visiting LA with a limited window, this is the kind of day that turns into real memories fast—because the plan is focused, the stops are iconic, and the guide helps you leave with photos that look like you meant to be there.